When you select an object, a toolbar will appear with the most useful functionalities that will save you a lot of time.
You can change its location to any place on the screen.
Depending on what kind of object you select, the content of the toolbar will change. Below you can see what you will find based on object type:
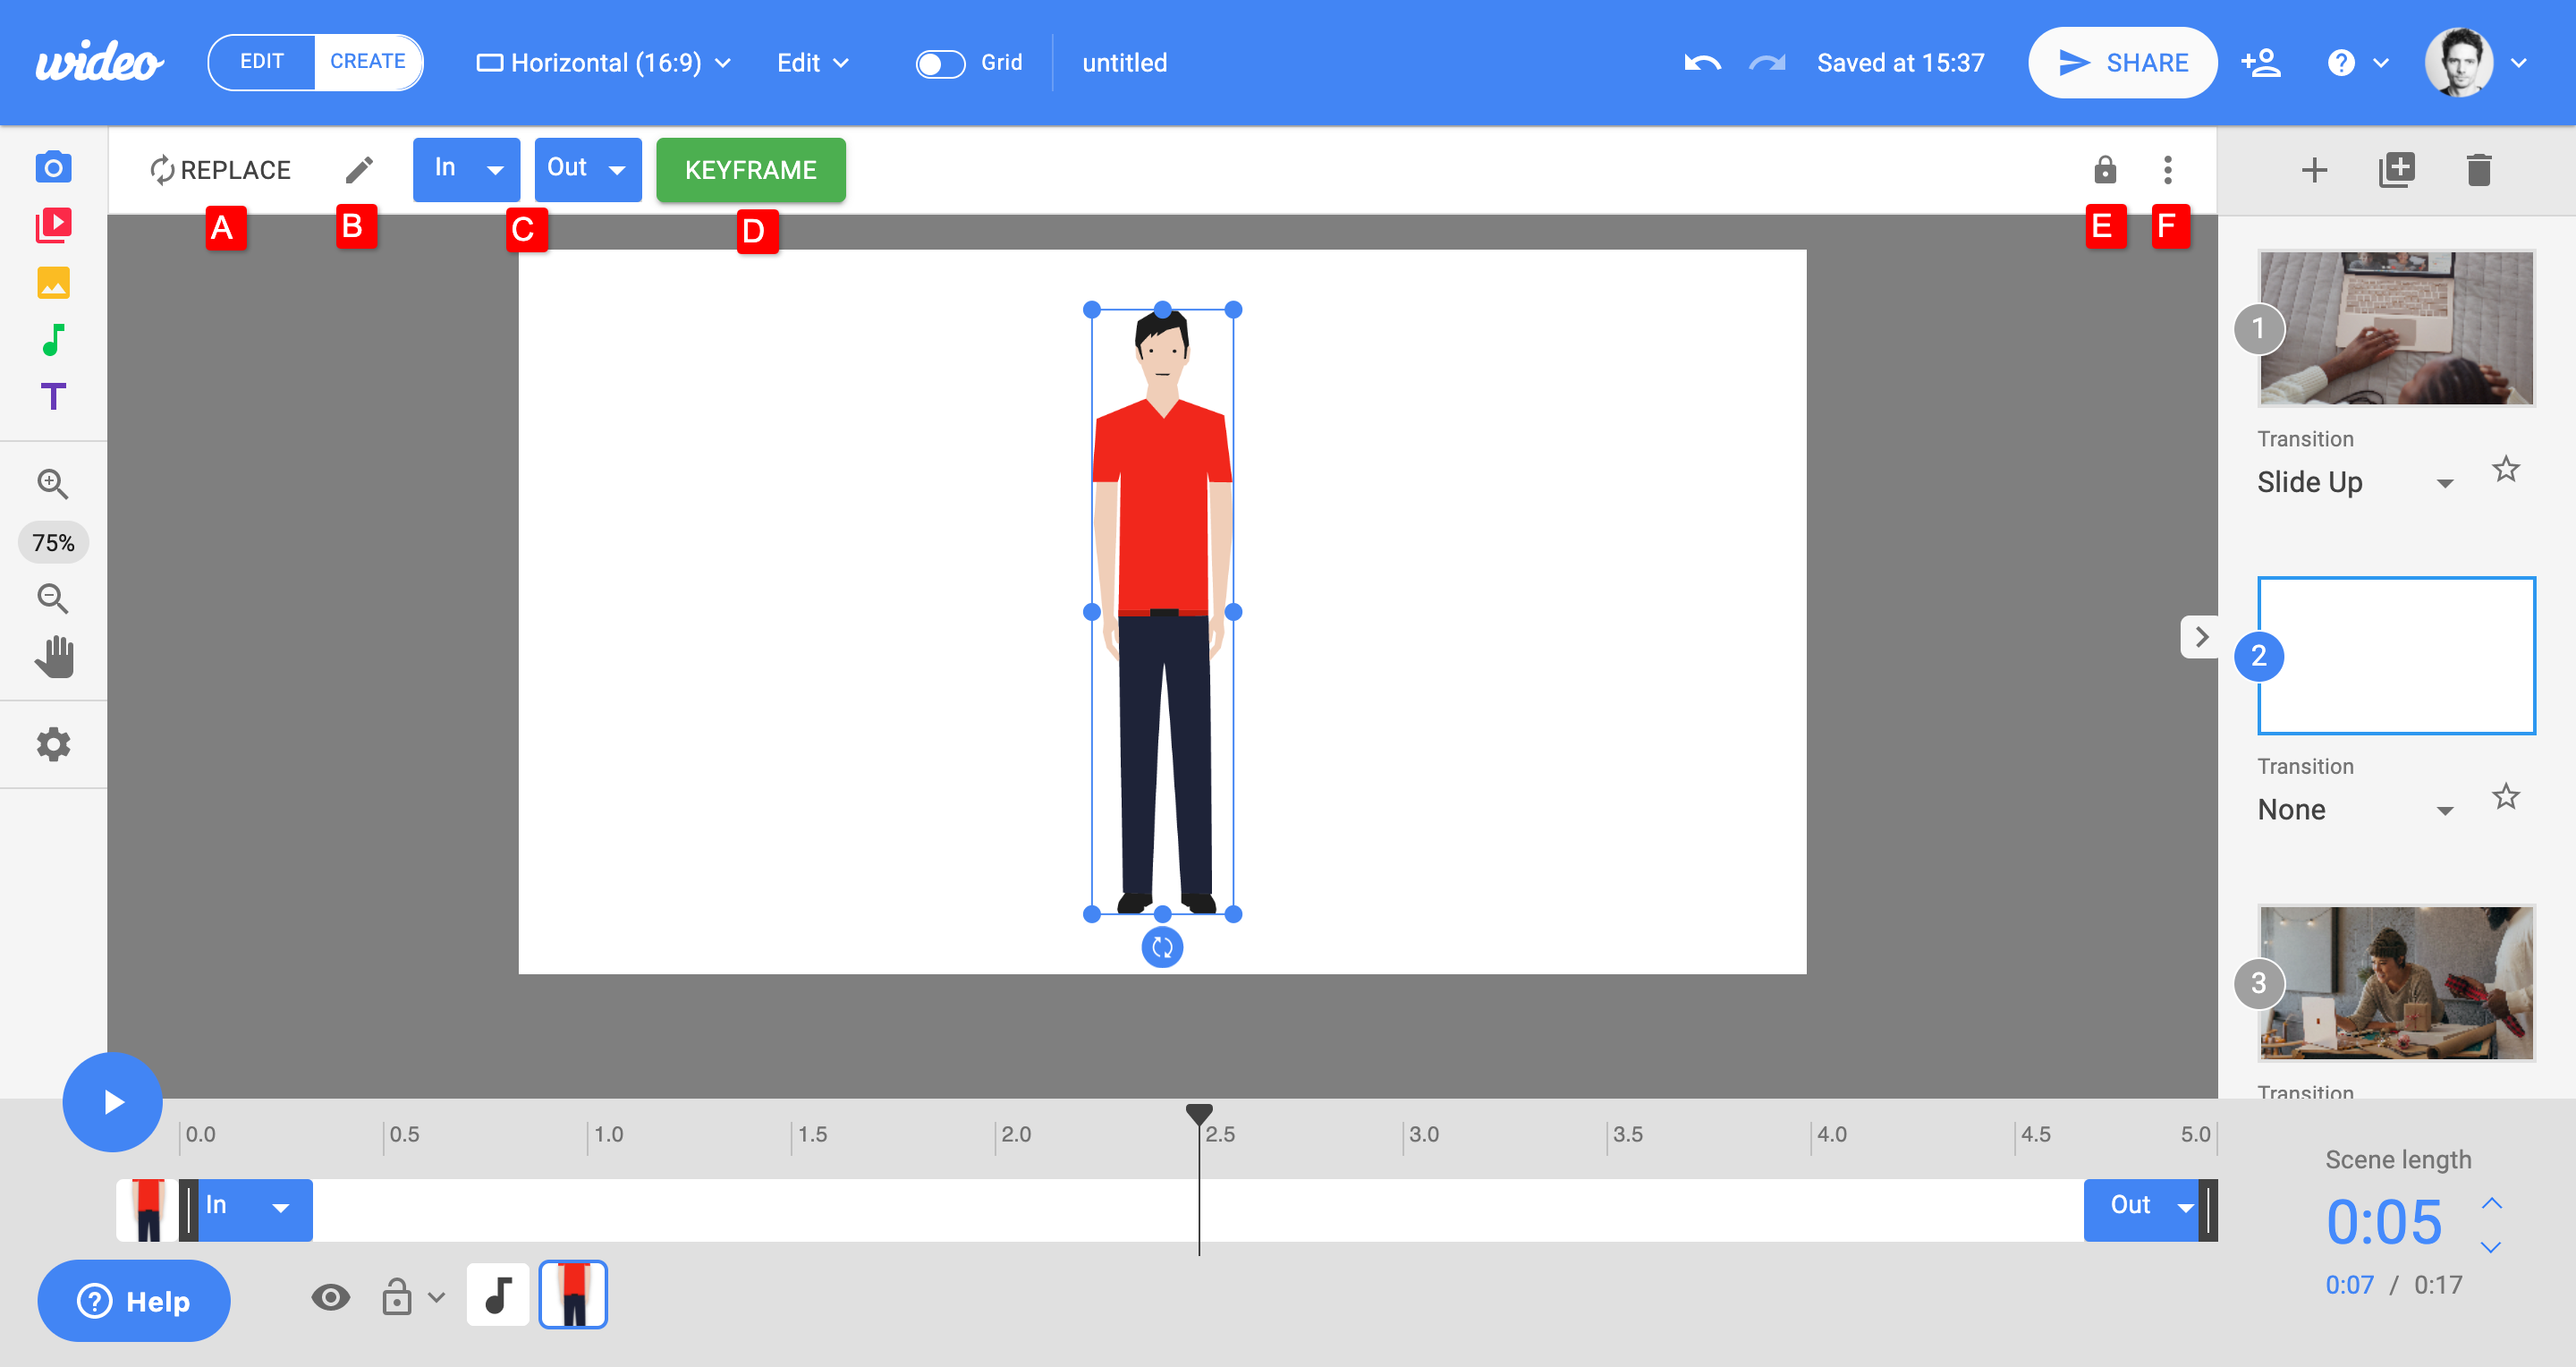
1. Library objects or uploaded images:

A. Replace
Replace the selected object with another from the library, uploaded images section, image stock library, or a new image from your computer.
B. Edit
Edit brightness, contrast, tint, saturation, crop, and many other image settings from the image edition pop up.
C. In/Out Animation
Apply an In/Out Animation effect to the selected object.
D. Add keyframe
Add a keyframe to create advanced custom animations.
E. Unlock the object toolbar
Unlock the object toolbar and drag & drop it wherever you want to personalize your workspace.
F. Show more settings
Open the right bar to find more settings to apply to the selected object such as numeric position, rotation, scale, opacity, alignment, etc.
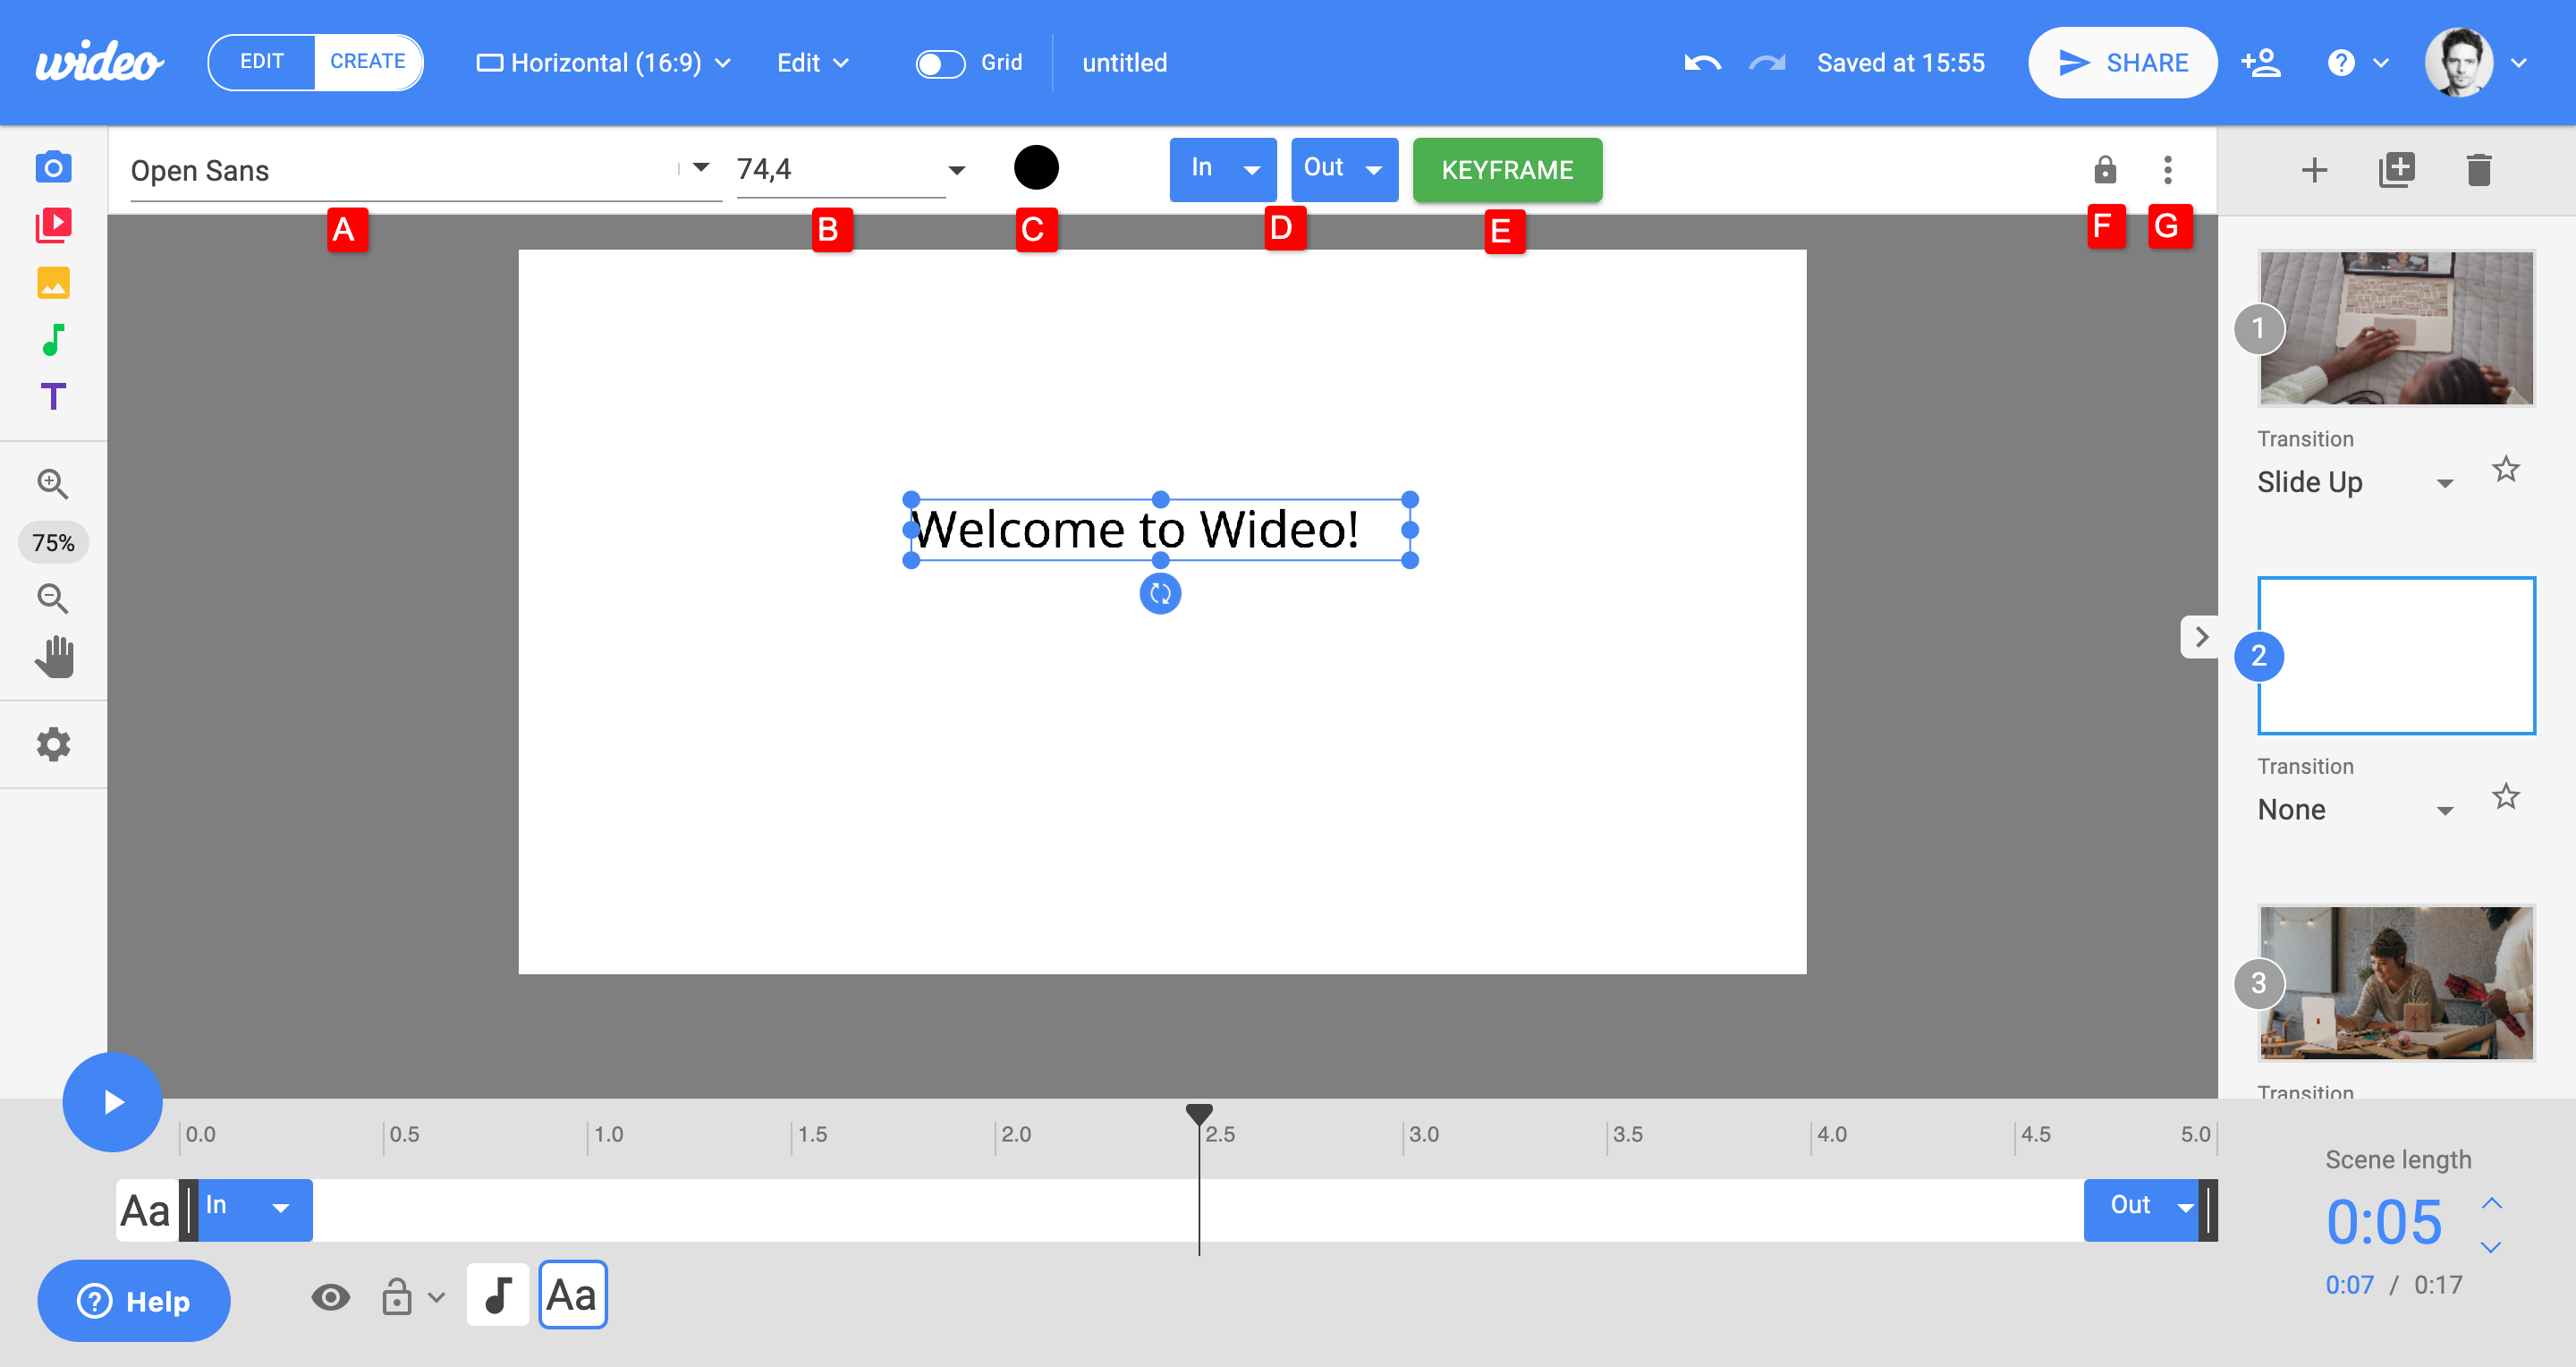
2. Texts toolbar:

A. Font family
Choose from thousands of Google fonts for the selected text.
B. Font size
Change the text size.
C. Font color
Choose a color to apply to the selected text.
D. In/Out Animation
Apply an In/Out Animation effect to the selected text.
E. Add keyframe
Add a keyframe to create advanced custom animations.
F. Unlock the object toolbar
Unlock the object toolbar and drag & drop it wherever you want to personalize your workspace.
G. Show more settings
Open the right panel to find more settings to apply to the selected object such as text alignment, line spacing, bold, italic, numeric position, rotation, scale, opacity, alignment, etc.
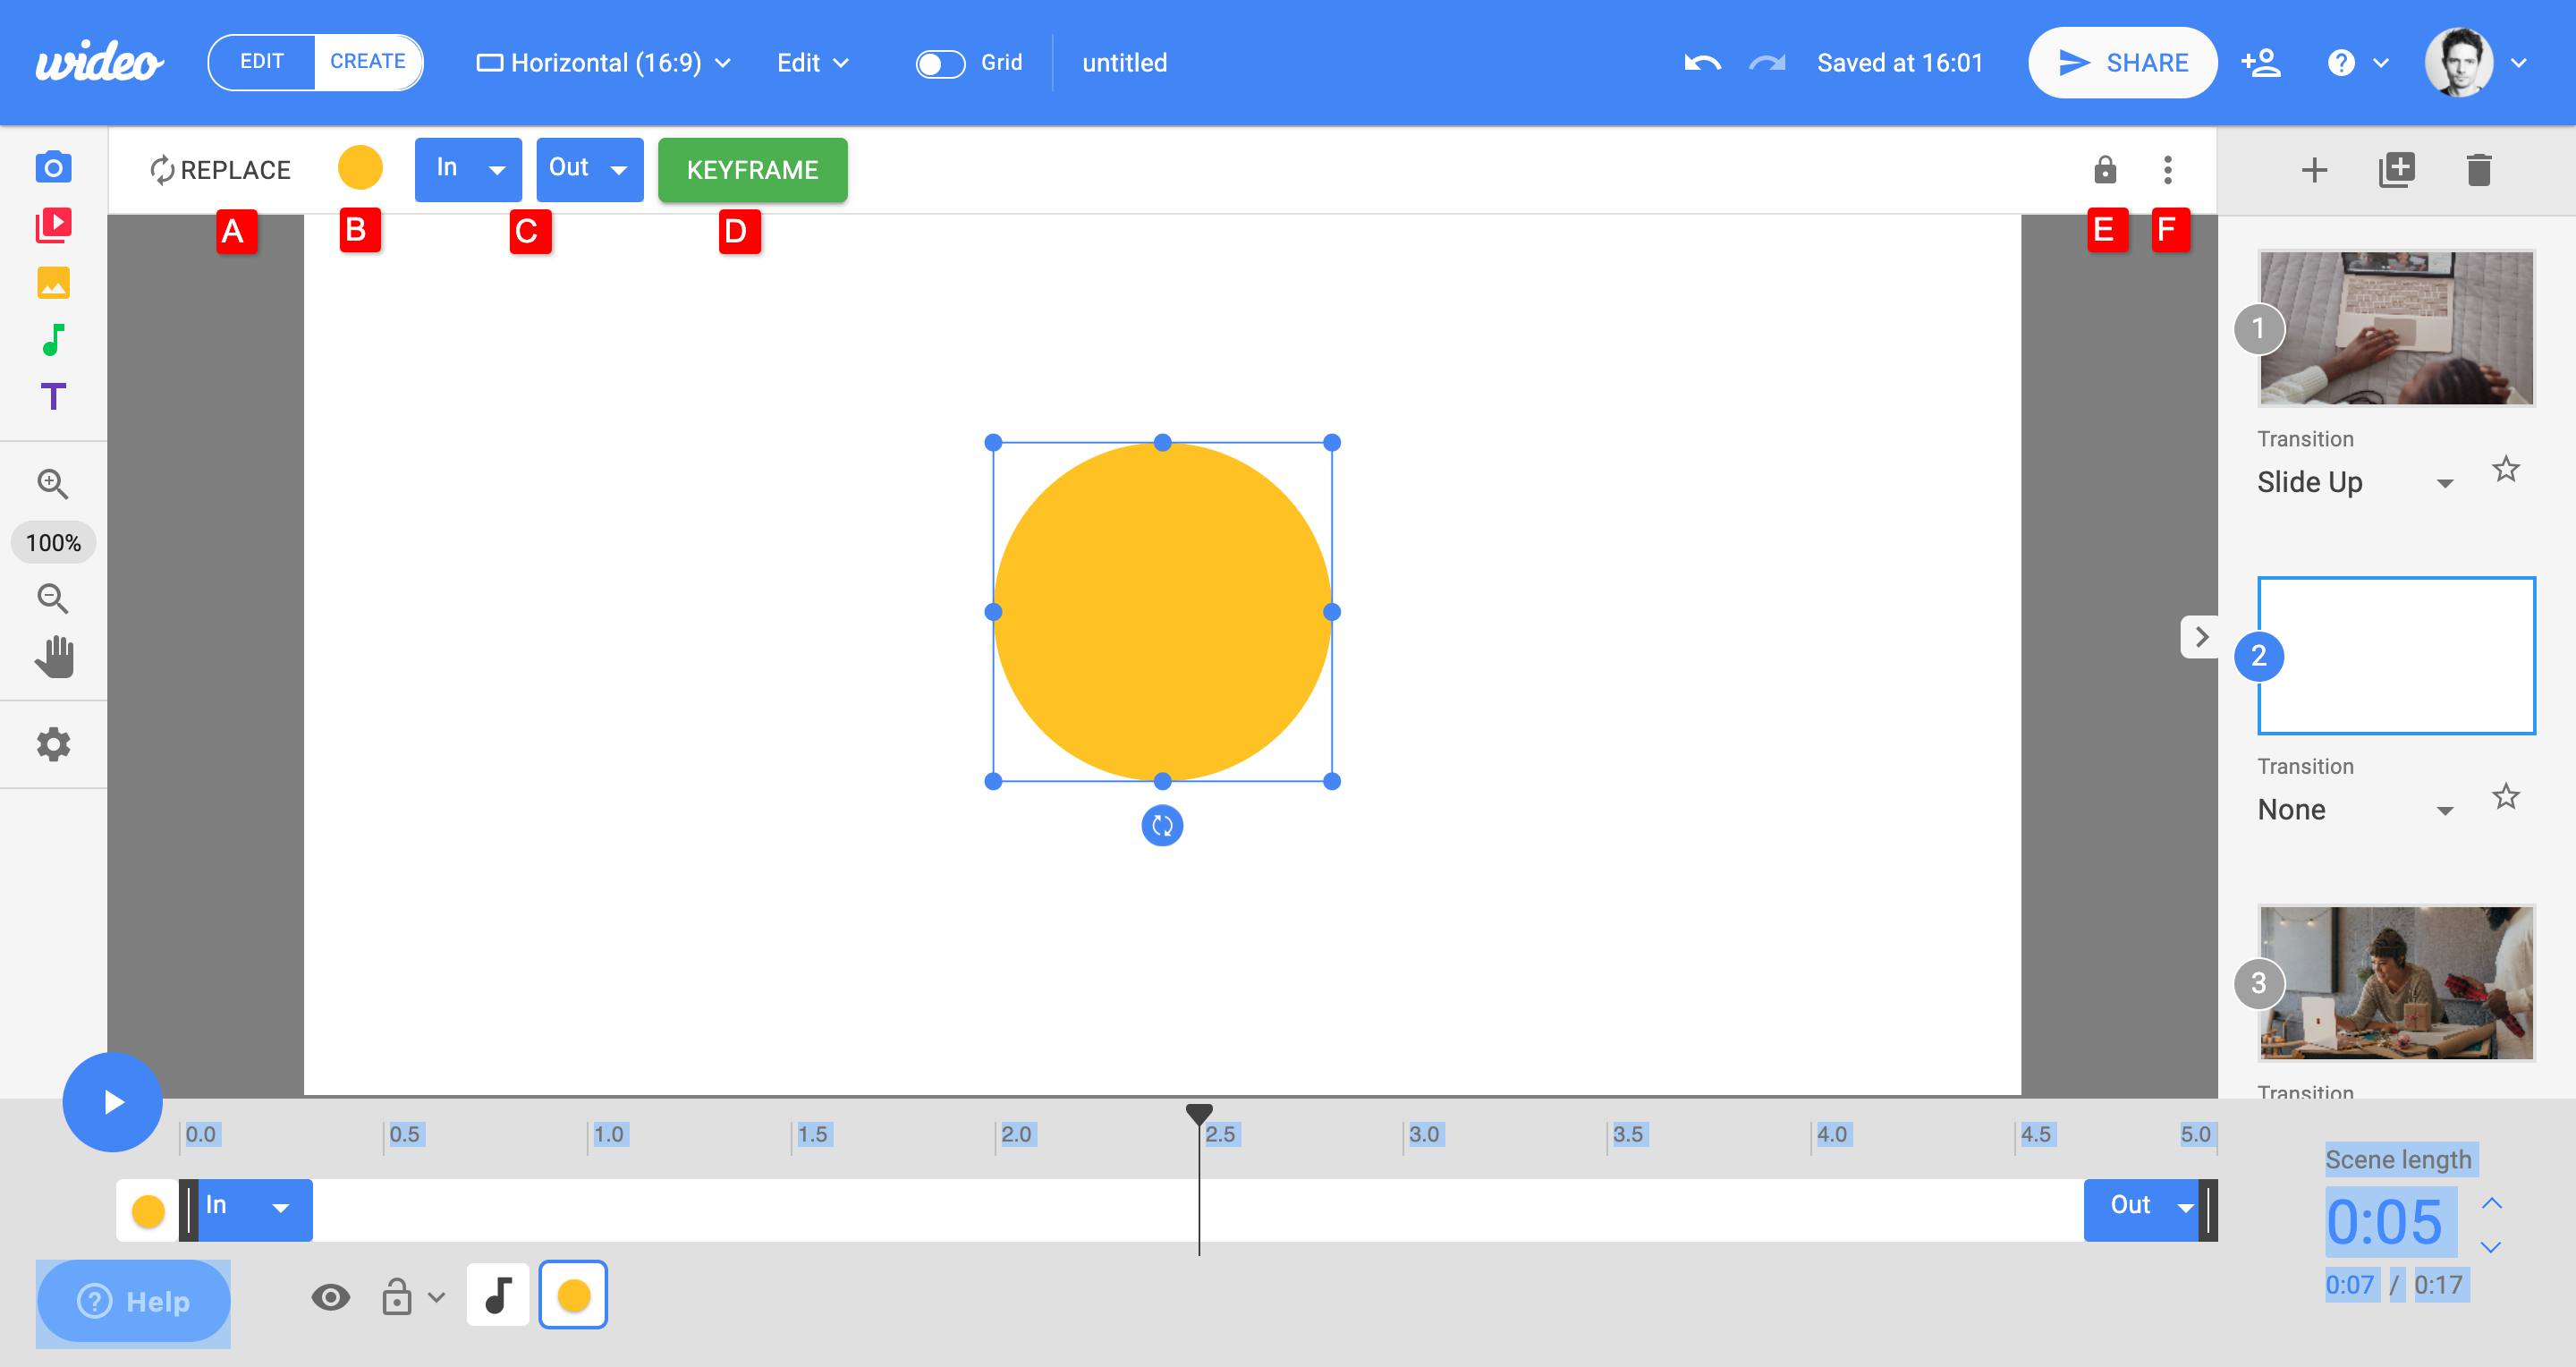
3. Shapes toolbar

A. Replace
Replace the selected shape with another shape or image from your library, the uploaded images, image stock library, or a new image from your computer.
B. Shape color
Choose a fill and stroke color to apply to the selected shape.
C. In/Out Animation
Apply an In/Out Animation effect to the selected shape.
D. Add keyframe
Add a keyframe to create advanced custom animations.
E. Unlock the object toolbar
Unlock the object toolbar and drag & drop it wherever you want to personalize your workspace.
F. Show more settings
Open the right panel to find more settings to apply to the selected object such as text alignment, line spacing, bold, italic, numeric position, rotation, scale, opacity, alignment, etc.
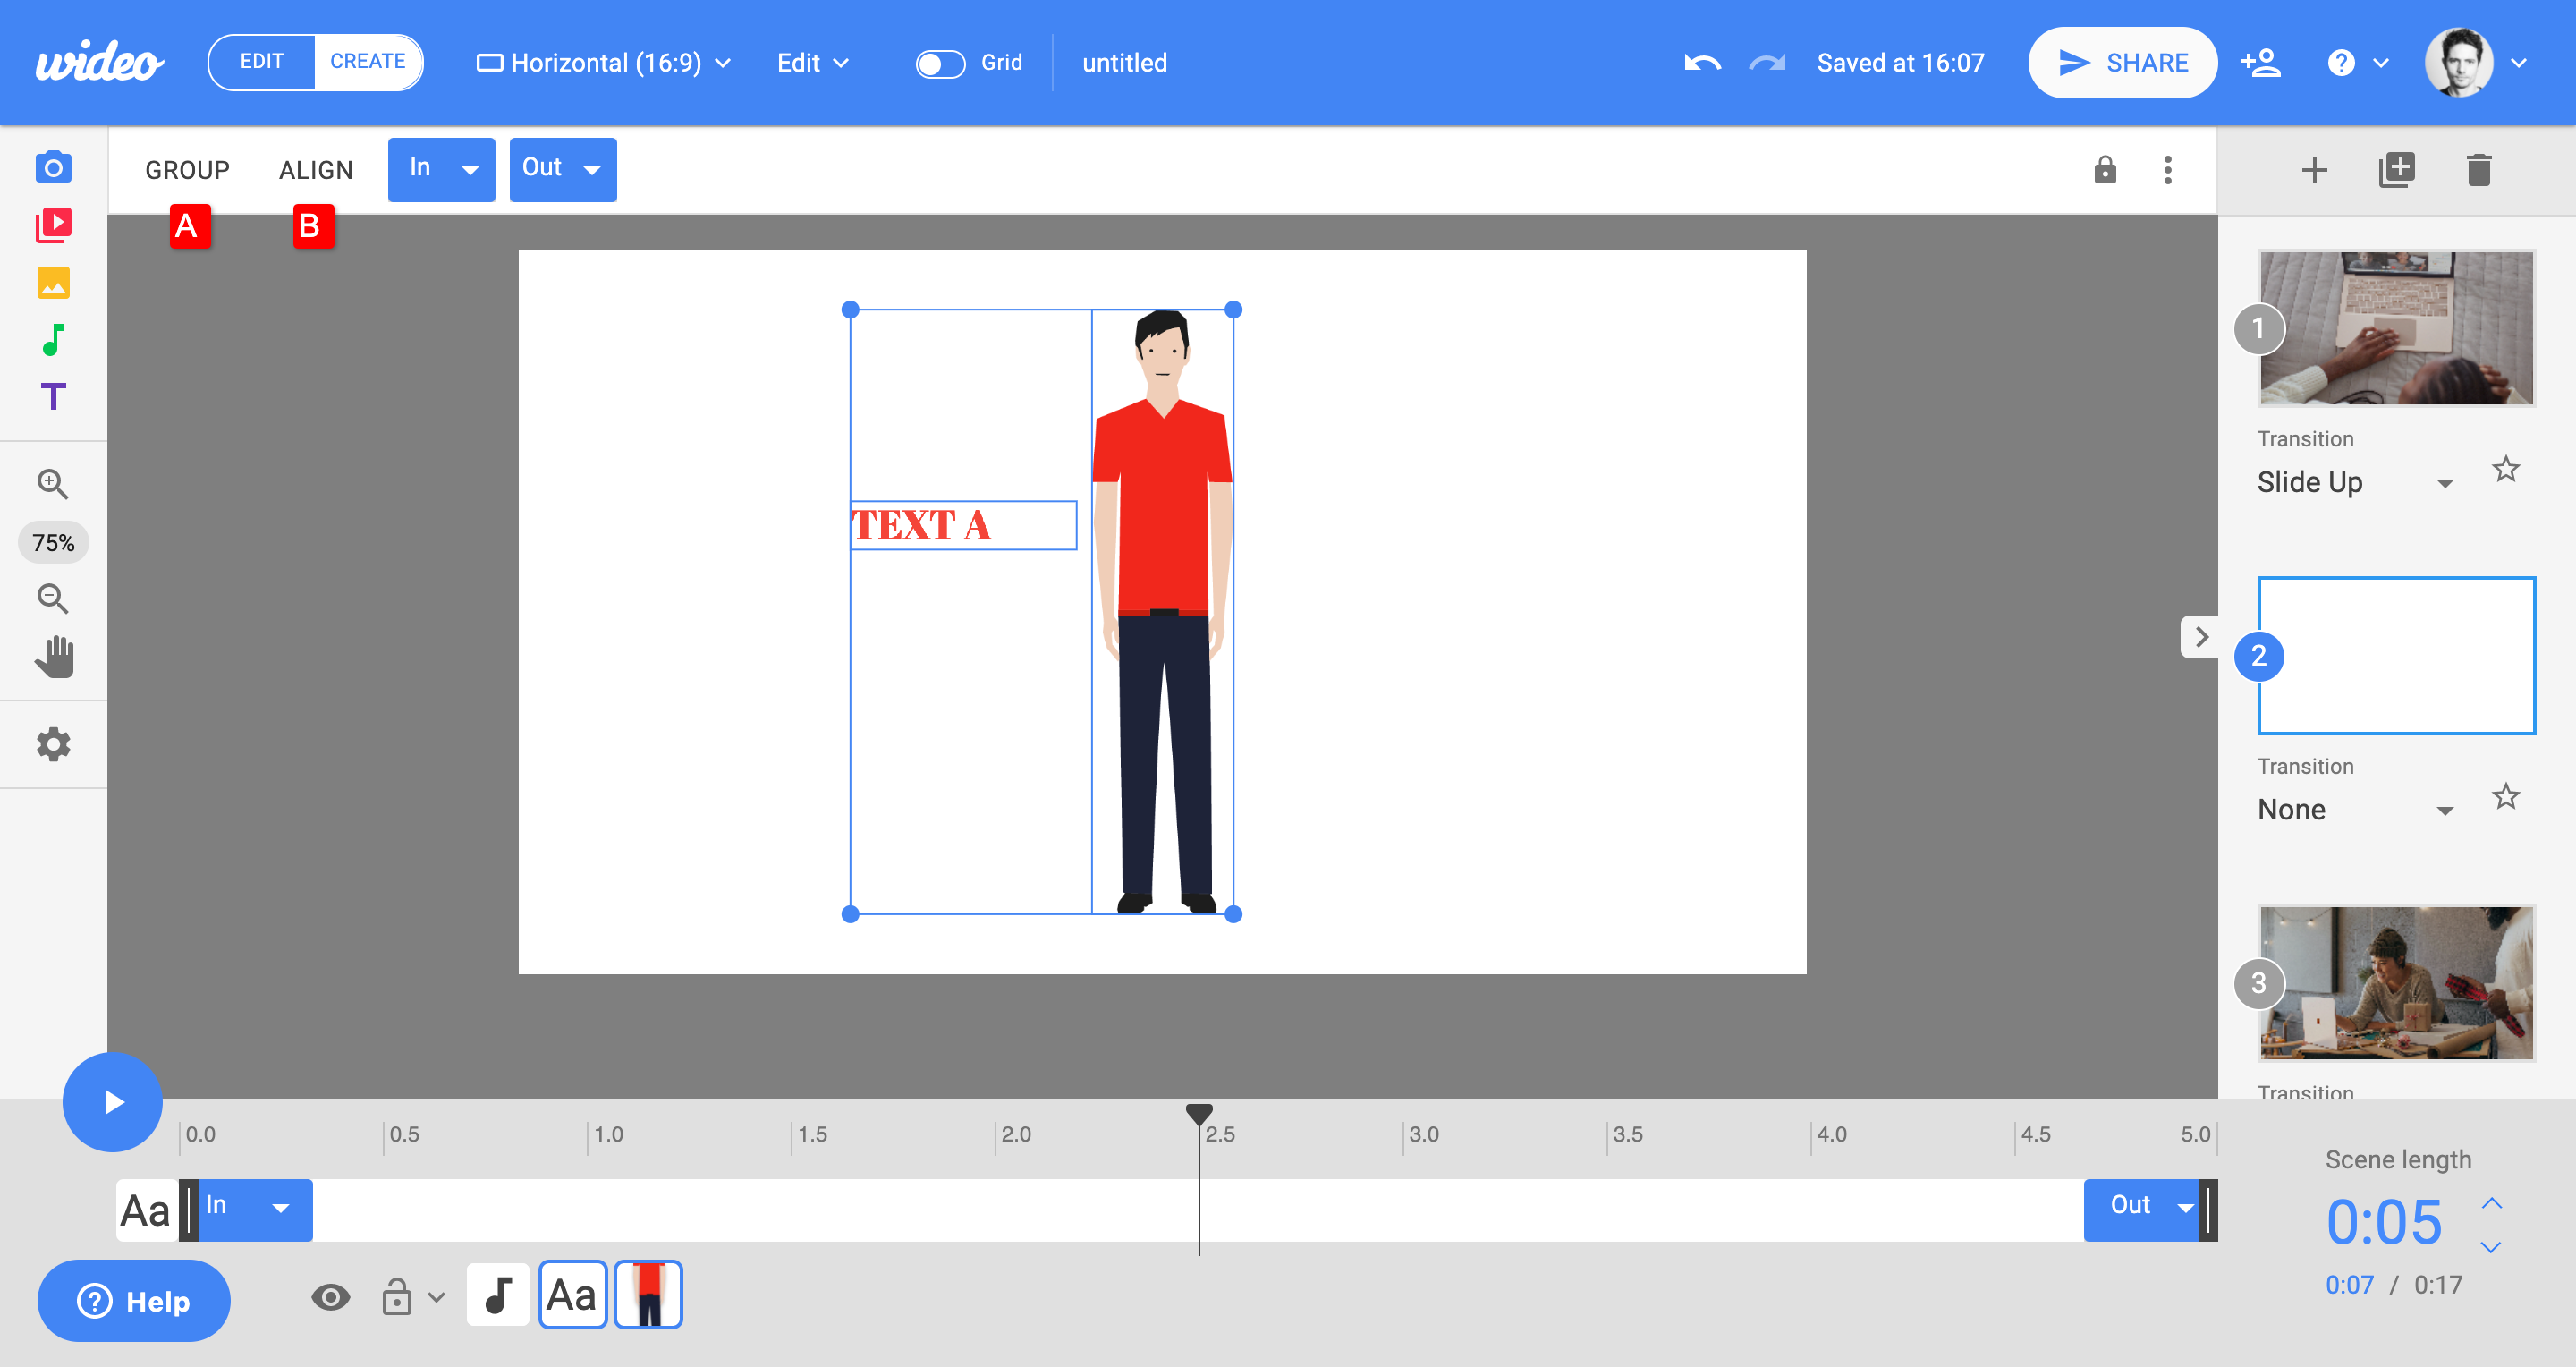
4. Multi-selection toolbar
If you select more than one object, you will see different options in the toolbar:
A. Group/Ungroup
Group/Ungroup the selected objects/group.
B. Align
Align the selected objects in relation to one another or within the scene.

